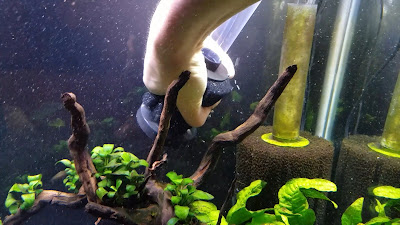
Okay, you just got your first sponge filter, and even though it’s supposed to be stupid easy, you have no idea how to put this thing together. No worries – here are easy, step-by-step instructions for installing a sponge filter, plus 3 bonus tips that’ll make it run as smoothly and quietly as possible.
I’ve been prepping for my next breeding project (shhh) and needed a new sponge filter for the fry tank, so I decided to put together a quick tutorial for you. Sponge filters are a great low flow option for baby fish, bettas, and axolotls. Plus, they’re one of the easiest and cheapest filters to set up and maintain. 👍
Materials
Before you start, you're going to need:- Sponge filter
- 3/16” aquarium airline tubing
- Air pump rated for the size of your aquarium
- Check valve
- Air stone
Instructions
Step #1: First you’re going to take apart the sponge filter. You should have a lift tube, the foam sponge, and a weighted base at the bottom. Inside the sponge is a strainer and the bullseye top of the strainer. |
| Source: yourfishstuff.com |
Step #2: My first bonus tip is that I always recommend adding an airstone to the inside of the sponge filter. It makes the bubbles smaller and a lot quieter, so it doesn’t sound like you’re making a witch’s brew all the time. The strainer for the large Hydro sponge in my main tank is completely hollow, so it was easy to add the airstone. But the strainer for my small Aquatop sponge filter has spokes in the middle, so I just cut them off.
My second bonus trick is that there’s actually two ways to connect the airstone:
- Method #1 is to cut off a little airline tubing to connect the airstone to the bottom of the bullseye. Make sure the tubing is long enough so that the airstone will rest at the bottom of the strainer. Then take the rest of the airline tubing, put one end through the lift tube, and attach it to the top of the bullseye.
- Method #2 is what I use when the strainer is really short and can barely fit the airstone. I completely bypass the nipple in the center of the bullseye by pulling one end the airline tubing through the lift tube, threading it through the spokes of the bullseye, and then connecting it directly to the airstone. Performs exactly the same and visually you can’t tell a difference.
Step #4: Place the sponge filter into the aquarium and squeeze it several times to get rid of most of the bubbles. It should sink immediately, but even if it doesn’t, eventually it will get water logged enough that it stays down.
Step #5: Now we’re going to install the air pump. Put the air pump where you intend it to stay and then cut the airline tubing so that it’s long enough to connect the sponge filter to the pump. Now you can connect newly cut end of the airline tubing to the nozzle on the air pump. My third bonus tip is to place the pump on a small hand towel to absorb some of the vibrations and lessen the noise level.
Step #6: If the air pump is below the sponge, you have one extra step of adding a check valve to prevent water from siphoning out the tank if the power is out. You’re going to cut the airline tubing a few inches outside of the aquarium (so that it’s closer to the sponge filter) and then connect the check valve in between. The banded side of the check valve goes toward the pump. You’ll know if you installed it backwards because no air will reach the sponge filter.
Step #7: The last step is to plug in the pump. Make sure there’s a drip loop in the power cable such that the cable dips down lower than the plug so that no water can reach the outlet.
And voila, you should have a plethora of bubbles floating to the surface, clearing your water of particulates and disrupting any surface scum. Plus, your beneficial bacteria will have a nice, new apartment complex to move into and breed like crazy.
 |
| New small sponge filter getting seeded with beneficial bacteria from an established tank |
Question of the Day
Do you use air stones with your sponge filters? Comment below to share your experiences because I’d love to hear them. Don’t forget to take time to enjoy your aquariums and I’ll see you next time!Subscribe to my YouTube Channel for practical fish care tips for busy aquarists and follow me on Instagram for daily updates! 🎮❤️🐟


No comments:
Post a Comment